
Dry Brushing 2.0
April 07, 2014
i already made a tutorial on dry brushing before, its just that my knowledge on this back then was ehhhh not so good. so i have decided to make another one.
materials:
-choice of paint
-brush [preferably old]
-tissue or old cloth
start by dipping your brush into the bottle of paint like so.

the thing about dry bushing is that you don't need that much paint to attain the effect. just take a small amount on your brush and thats all you need.
next, dab/wipe on tissue or cloth till you could barely see paint coming of it.


i exaggerated a bit on the second picture, it actually depends on the kind of effect your after. if you want a big blotch o dry brushing then you probably need a bit more on your brush. but if your going for that subtle scratches, highlighting effect then you only need a small amount.

here I'm going to be working on the hand of my dreissen, gonna give slight scratch effects to give it a slight worn out look.

The secret to getting a better effect is to continuously brush the sides and corners of an area with your brush. this will let the paint grip on to those areas. the more times you dry brush the deeper the effect like so…

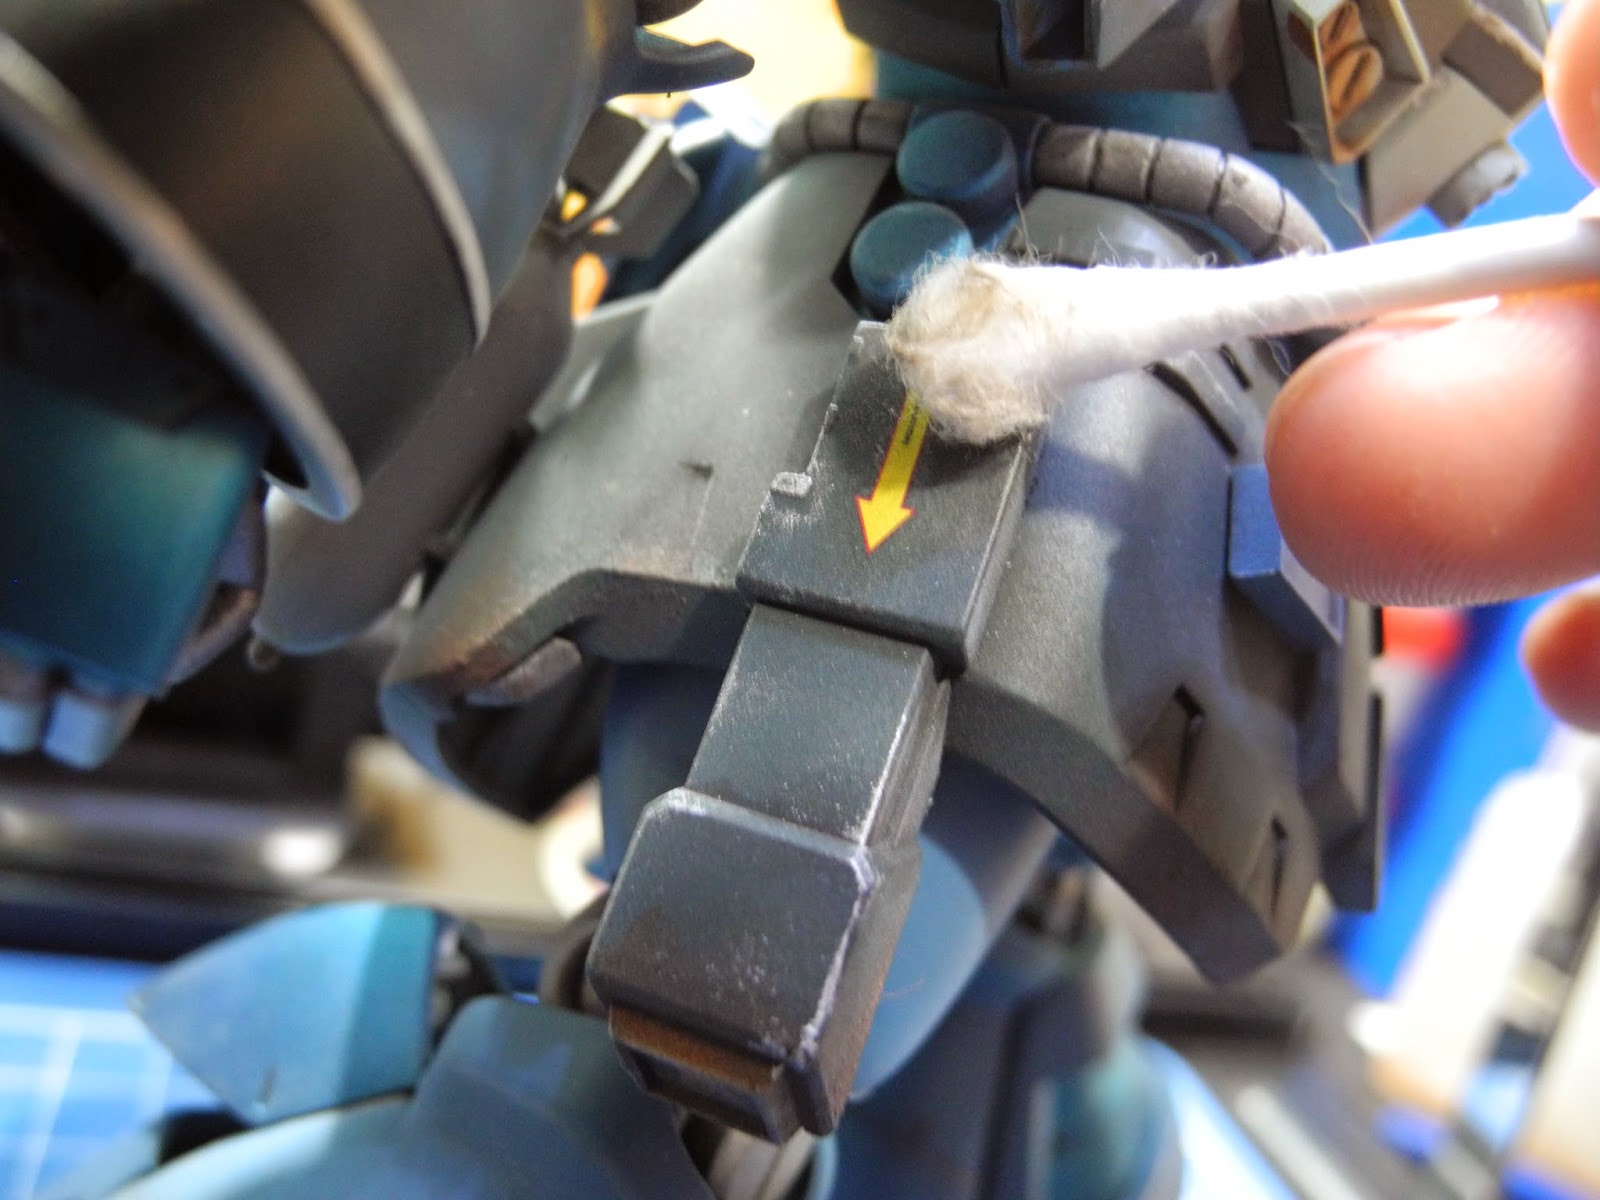
i slightly overdid the dry brushing in this photo. It really depends on what effect you want to show.


i only wanted to go for a small highlight, so to remove this i just dip a qtip into alcohol and wipe the excess away. since the base coat is lacquer and i used acrylic for the dry brushing, the base coat will not be affected.

here are other examples of good dry brushing spots.


with the proper techniques used, you can end up with a nicely weathered model.

0 comments