
gundam tutorials: weathering / basic dry brushing
December 18, 2012
hey guys! welcome to weathering 101 which is dry brushing. the good thing about dry brushing is that it's effects are not permanent unlike battle damage, and can be easily washed off with its specific thinner. so what is dry brushing? dry brushing is a painting technique that adds extra details on your gundam like burns, scratches, rusting, and many more. this is also accepted as battle damage, though its not the very serious ones. dry brushing, takes more time than an ordinary paint job, but it is very useful in making your model look more realistic.
materials:
>small flat tipped brush
>acrylic paints ( black ) it depends on your wanted effect
>piece of paper/ cloth
>cotton buds
>thinner
>graphite pencil
in this tutorial i would only be using black just as an example on how dry brushing works, but there are a lot more pigments used in dry brushing.
first, shake the paint bottle a couple of times before opening. when opened there should be a small amount of paint stored on the cap.


using the paint stored on the cap, dip your brush adding a little paint on the tip.
since we are not going to use most of it, rid the excess by dabbing your brush on a piece of paper or cloth.

keep wiping until paint is barley, or not coming of it.

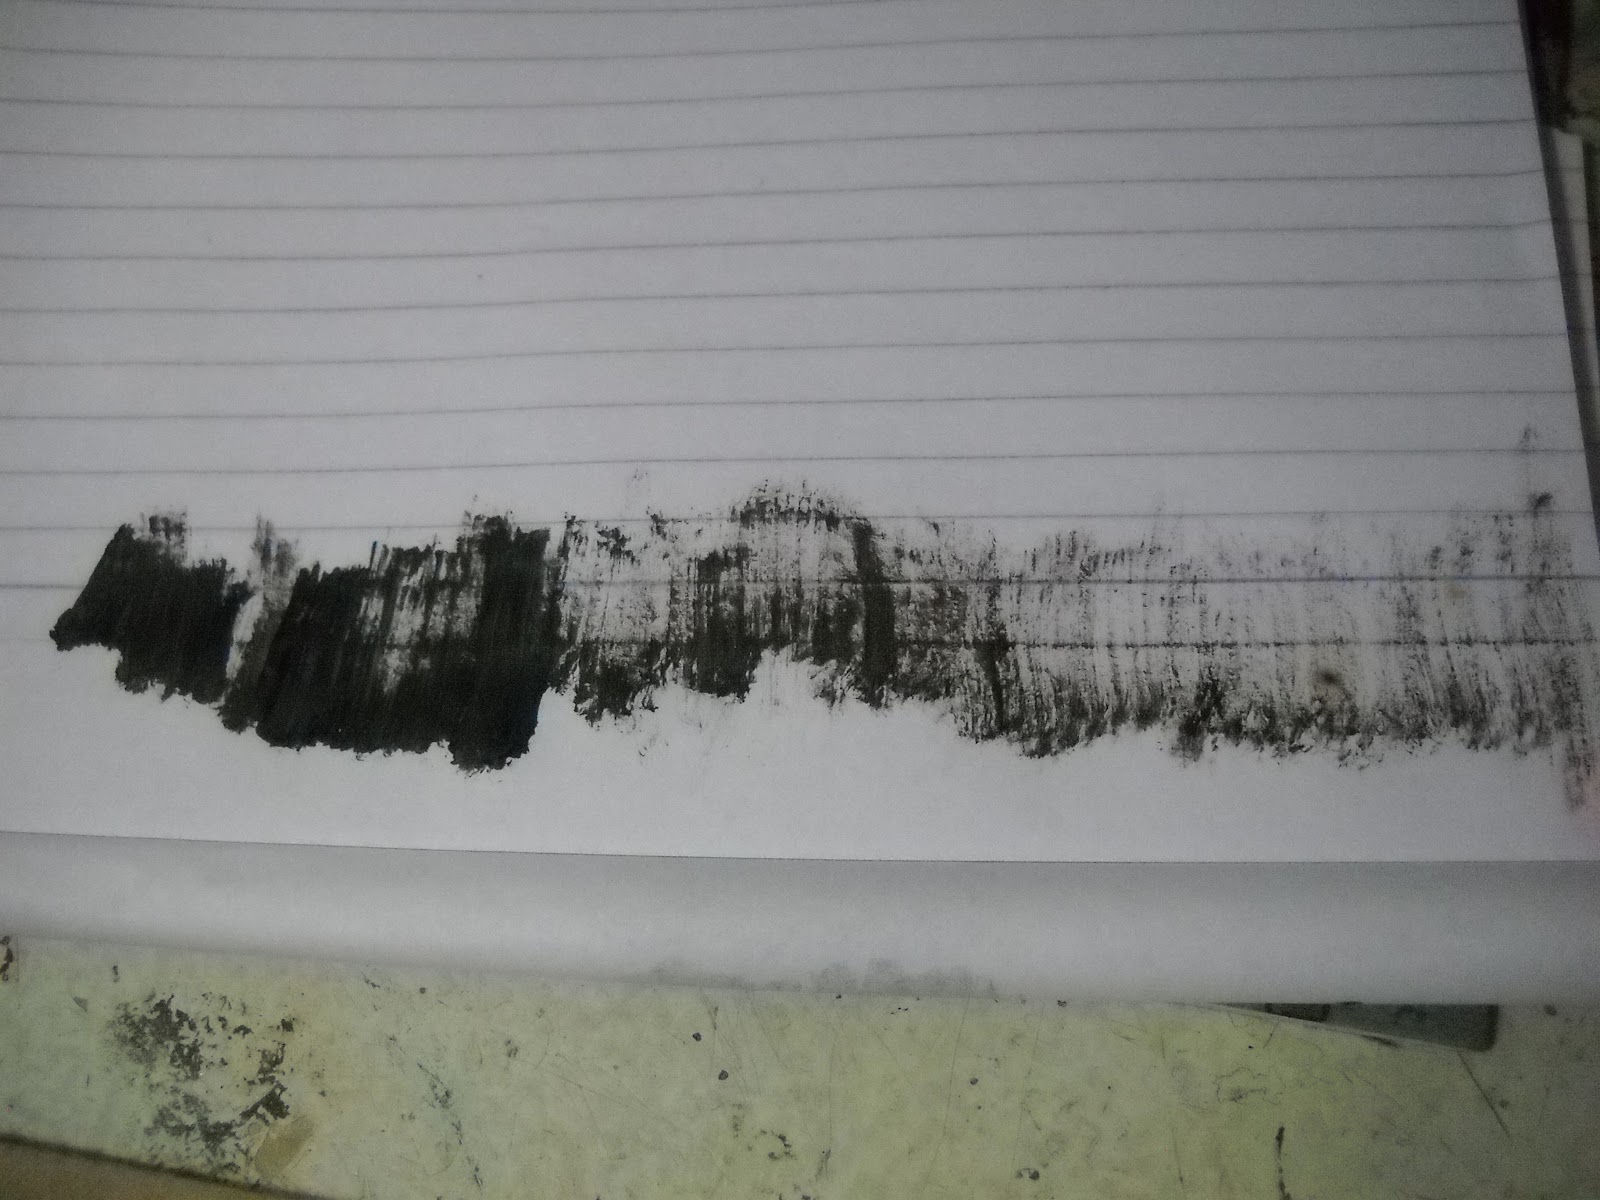
to know if its about right, it should look more like the one on the right side.
(the lighter one)
once thats done, you can proceed to brushing the piece.

(the lighter one)
once thats done, you can proceed to brushing the piece.

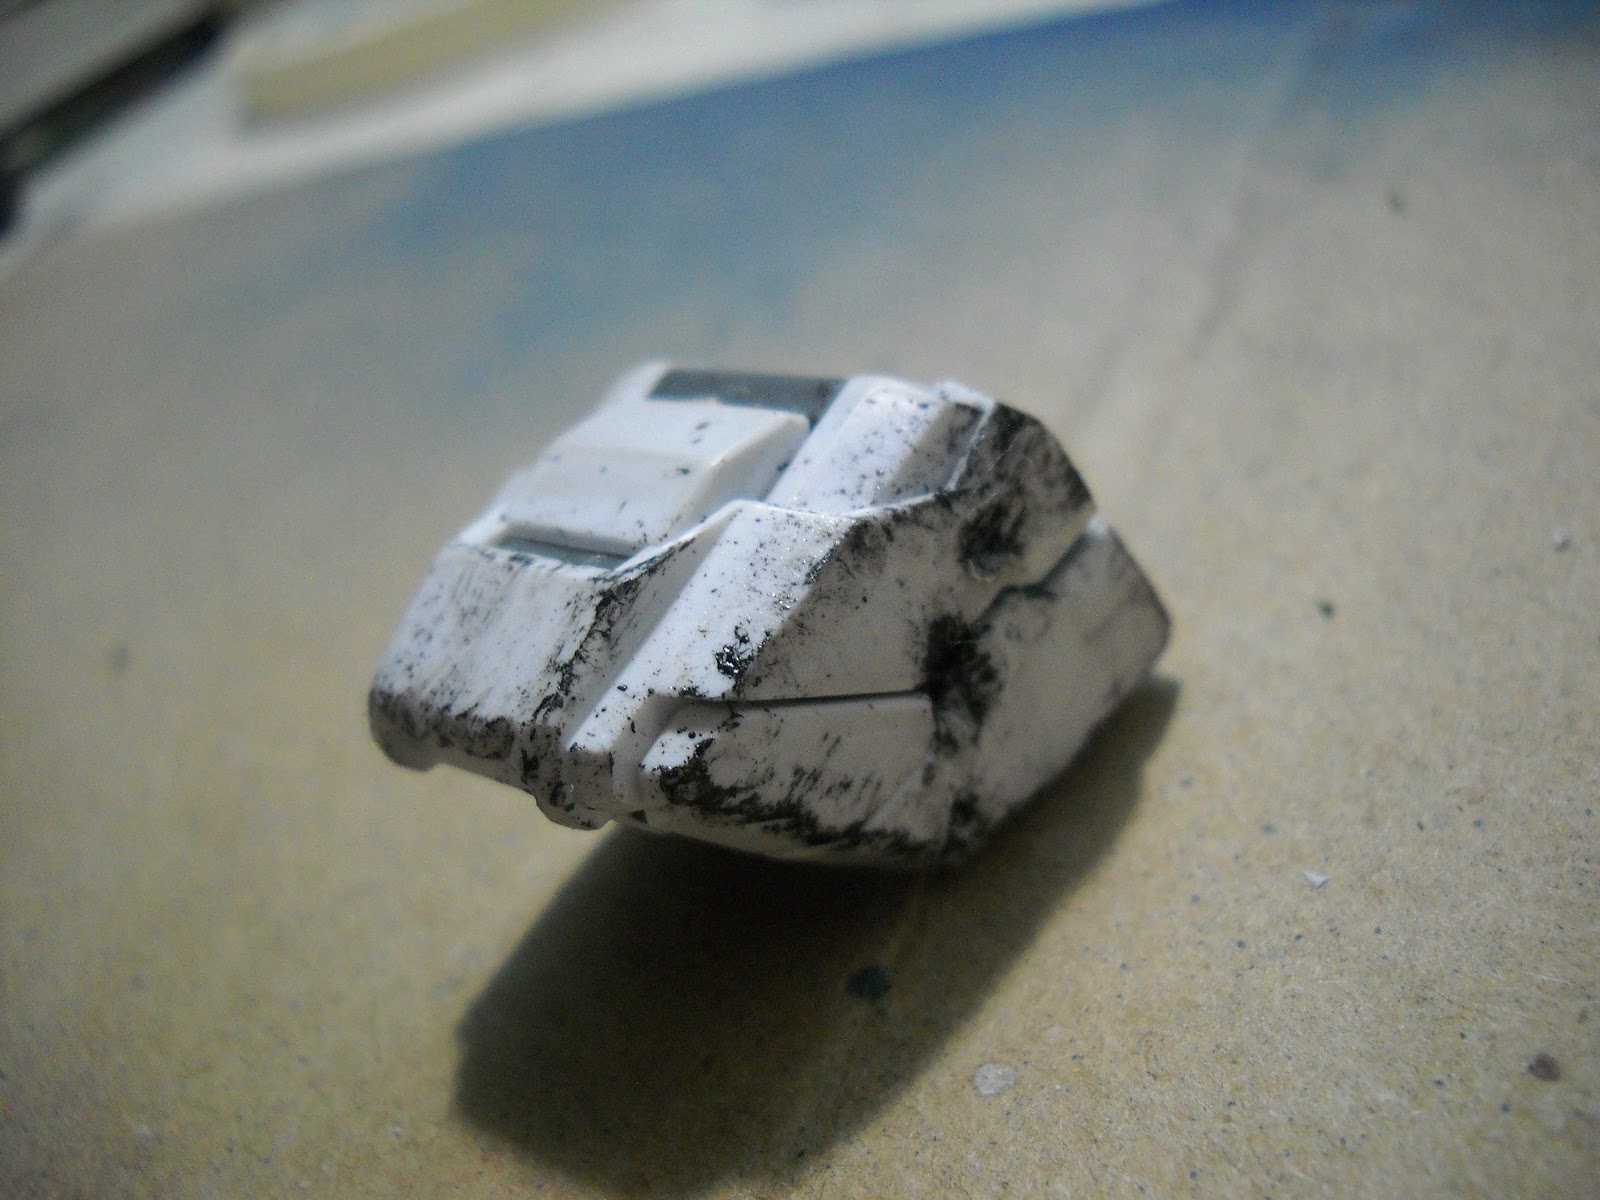
lightly brush the edges and the curves of the part, you must do this multiple times before you actually get to see the effect on the piece.
get this right, and it should look like this.

tah-dah! master piece. it looks pretty rough huh? so for the people who don't really like this kind of look (like me), you could "fix" it a bit, by doing the step below.

start by dipping a cotton bud in a dish of thinner and carefully smudge the paint about the piece towards the flow of gravity. this would slightly tint the whole piece making the weathering smoother and even.

make sure to focus on the damage on the part before you proceed on weathering anything else, because it's damage right? try making it stand out more by starting the dry brushing from there.

the final step, using a graphite pencil, shade the edges of the piece to give it a metallic shine.

and thats it, try experimenting on other colors for the dry brush technique like: black for burns, silver for scratches, and brown for rust, make your own combinations to make your gundam look more interesting!
get this right, and it should look like this.
tah-dah! master piece. it looks pretty rough huh? so for the people who don't really like this kind of look (like me), you could "fix" it a bit, by doing the step below.

start by dipping a cotton bud in a dish of thinner and carefully smudge the paint about the piece towards the flow of gravity. this would slightly tint the whole piece making the weathering smoother and even.

make sure to focus on the damage on the part before you proceed on weathering anything else, because it's damage right? try making it stand out more by starting the dry brushing from there.

the final step, using a graphite pencil, shade the edges of the piece to give it a metallic shine.

and thats it, try experimenting on other colors for the dry brush technique like: black for burns, silver for scratches, and brown for rust, make your own combinations to make your gundam look more interesting!
P.S. dry brushing ruins your brush in time, so i suggest you use an old one while doing this.
3 comments
Nice tutorial! I followed along and got some nice effects, particularly a nice metallic look on the edges, now I'm curious about top coating this.
ReplyDeleteAfter you use metallic paint or graphite, do you use a flat top coat on top? Does the flat top coat remove the metallic shine from the dry brushed scratches or graphite?
glad you liked it, well i usually spray on my flat top coat before i do my weathering unless i was going for a burned look. and yes, spraying a flat top coat does take off the shine from the paint but you can easily redo the graphite lining.
ReplyDeleteThanks for the information, I did a flat coat before the dry brushing, but I like the metallic look so I'm going to keep the enamel paint on top. Hopefully it won't rub off too easily.
ReplyDeleteWhat competition are you working on?