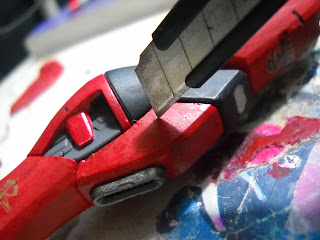
gundam tutorials: battle damage w/ cutter
November 12, 2012
this technique is a simple way off adding battle damage to your mecha, great for bullet holes or explosions and simle dents and scratches. this is quite basic so you dont need to be a great modeler to apply this to your gundam, you just need a simple cutter and your hands.
materials:
>cutter/art knife
>paints (optional)
>paint brush (optional)
find a nice spot which you would want to do this type battle damage, make sure that place is logical and not some random area which you just picked out. now align your cutter and the area, and with the tip of the blade pointing down, twist the cutter while and apply enough pressure on it. now you should start to see a hole being formed underneath your blade. keep scewering the blade util the depth of the hole is to your liking.
brush of any plastic shavings around the hole.
next, cut your own dents and scratches on to your part. [be creative]
after multiple cutting ^
for the weathering phase, i suggest
dry brushing the piece with black, or paint with high pigment.
i prefer using flat black, or grey, because it has a good burnt look to it.
i overdid the weathering on this part, but it's for you to decide the intensity of the damage.
dry brushing makes the whole process worth it.
also try damaging the decals a bit.
next, add dry brush a little of silver for paint chipping and scratches.
in this tutorial, i used metallic powder as an exchange for silver. this works the same, add a bit to the tip of your brush, then brush the edges evenly through out the piece.
final result.
thanks for reading, till next time!
thanks for reading, till next time!


2 comments
nice job! looks realistic even though you just used a cutter, nice one!
ReplyDeletemad cutter skills bro.
ReplyDelete